Yeah, obviously our leaves here in Colorado don’t like to leave big impressions, or at least in a baking powder and soda clay. Thus it was on to plan B. Did I have a plan B?
Since we were celebrating our Thanksgiving on the following Sunday, plan B became me quickly grabbing my tin of cookie cutters. My sister decided that candy canes would look oh-so-much more festive hanging from mini-pumpkins than leaf impressions would have any way.
We cut out the candy cane shapes with the cookie cutter and then with a skewer made a hole at the top of each of them. It took at least 24 hours for them to dry and they never really did firm up and were very brittle. In hindsight, my sister said that air-dried clay would have been much better and if we do something similar next year will definitely go that route.
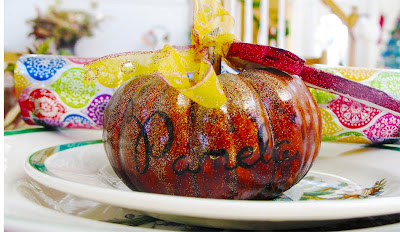
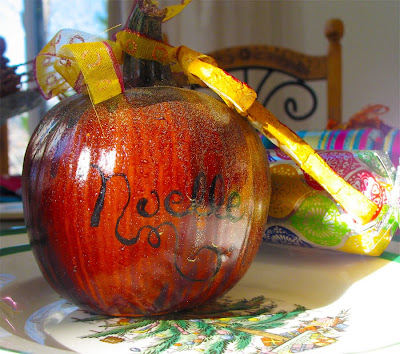
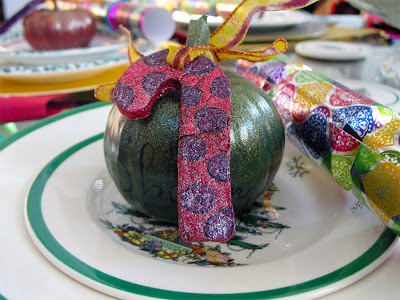
Since candy canes tend to cry more Christmas than Thanksgiving, we decided to paint our mini-pumpkins. I didn’t want the traditional red and green colors so chose a burgundy, forest, and of course, with making my sister help me out on them, purple.
We used a floral spray paint that gave them a neat translucent effect, but after letting them dry overnight, we thought they were lacking a bit. Never fear I told my sister because I have, that’s right, glitter spray paint. Thus after a shot of gold glitter, we were quite pleased with them.
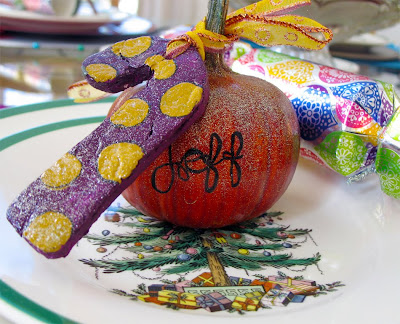
Meanwhile, after letting our candy canes harden up, we chose 3 coordinating paint colors for them: burgundy, purple, and mustard. Why mustard? That would be because I didn’t have any of that type of paint in green on hand to the dismay of the sister, but we were able to work through it. After the base coat dried, we, okay my sister, painted pokka-dots on them. Again, after they dried, we thought they were lacking a little something something, so yes, out came the glitter spray paint, this time silver. Excellent.
Then the wonderful part of having an artist as a sister (well there are actually too many wonderful parts to mention) is that once the mini-pumpkins were completely dry, she wrote each of the guests’ names on them in a very fancy manner. I believe she used a micron pen, but don’t quote me on that.
We let everything dry over night, then the day of the dinner we, okay, okay, again, my sister, cut ribbon and threaded it through the holes of the candy canes and then hung them on the pumpkins. Now, I would have helped with that part but the only down side to having an Executive Chef as a husband is that he is use to having a kitchen staff, which then at home ends up being me.
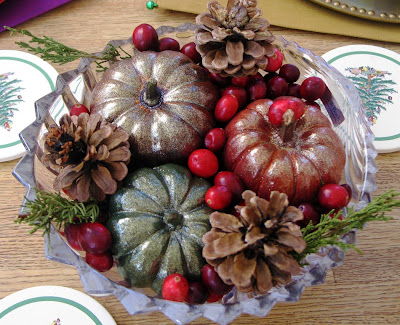
For the main centerpiece I had gathered up some pinecones and evergreen sprigs from the yard. There was some left over glitter paint, so I took a few of the pinecones and gave them a coat of glitter. Then I sprayed the evergreen sprigs with the green floral paint to give a more vivid color. Once dried, I took a glass fruit stand, placed some sparkling pics I had bought at Michaels on the bottom, then on top of those I placed the pinecone and evergreen sprigs. Finally gave it a splash of burgundy color with a few fresh cranberries. We had some left over mini-pumpkins so decided to do another centerpiece using them. We put them in a glass bowl with fresh cranberries and a few evergreen sprigs and pinecones.
I thought they turned out pretty cool. A HUGE thank you to the sis for helping me out on that creative endeavor.


No comments:
Post a Comment